How to Repair a Deep Scratch in a Wooden Table?

Time:2026-09-20 Author:Oliver
0%

Repairing a deep gouge requires more than rubbing a marker across the damaged area. A careful process begins with identifying the table’s wood, stain, and protective finish. Clean the scratch gently, then inspect its edges under bright, angled light. Loose fibers, crushed grain, and exposed pale wood each require different treatment. Rushing this inspection creates a repair that looks darker than the surrounding surface.

Bob Flexner, a respected wood-finishing educator and author, has said, “The finish is the most important part of any piece of furniture.” That principle matters here. A deep scratch often damages both the color layer and the finish above it. Learning how to repair a deep scratch in a wooden table means rebuilding those layers carefully, not hiding everything with one thick coat. Use a sharp chisel or fine abrasive only where necessary. Apply matching filler to the deepest section, allow it to cure, then blend stain gradually with a small artist’s brush. Thin coats usually look more natural.

The result may not become invisible. Real wood changes color with age, sunlight, and household use. That is normal. A slightly visible repair can still be successful when the surface feels smooth and the color transition is subtle. Test every product on an unseen area first. I would not skip this step, even when the table seems ordinary. Finishes react unpredictably, and a confident shortcut can enlarge the damage. Wax, oil, or a compatible topcoat can restore protection after the repaired area has fully dried. Examine the surface again from several angles before returning the table to daily use.
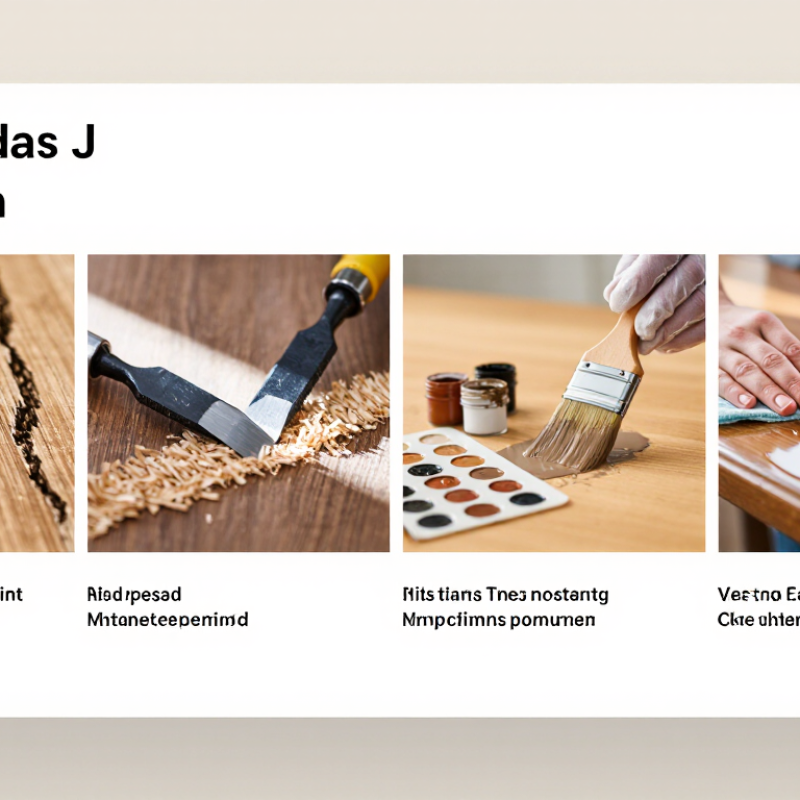
How to Repair a Deep Scratch in a Wooden Table?

Assess the Scratch Depth and Identify the Table’s Finish

Before repairing a deep scratch, assess its depth under bright, angled light. Run a fingernail across the mark. If the nail catches, the damage likely reaches below the protective film. A pale line may expose raw wood, while a glossy edge often indicates a fractured finish. Do not sand immediately. That can enlarge the damaged area.

Identify the table’s finish from its behavior, not appearance alone. Place one small water drop on an inconspicuous surface, then remove it after five minutes. Beading suggests a continuous film finish, while darkening may indicate exposed wood or a porous oil finish. This test is imperfect. Wax can imitate both results. Shellac, lacquer, varnish, and modern water-based coatings may also overlap visually.

The USDA Forest Products Laboratory’s 2021 Wood Handbook notes that indoor wood commonly reaches about 6–8% equilibrium moisture content. This matters because moisture changes can reopen a repaired scratch. Keep the table in a stable room before judging the damage. For uncertain finishes, test denatured alcohol or mild solvent only on a hidden edge, using ventilation and protective gloves. A finish that softens quickly may be shellac or a solvent-sensitive coating; no reaction does not prove safety.

Use a cotton swab and examine the transfer on white paper. Record the color and gloss before touching the scratch. Professional finish evaluation should remain conservative. If the scratch exposes dark end grain, feels sharp, or reveals loose finish flakes, local touch-up may fail. The repair may require controlled leveling and refinishing by a trained furniture conservator.

Clean the Damaged Area and Prepare the Repair Materials

A deep scratch needs a clean surface before any filler or color is applied. Inspect the damage under a bright side light. This reveals loose fibers, crushed edges, and traces of old finish.

Do not scrub yet.

Remove dust with a soft brush or a clean vacuum attachment. Lightly dampen a lint-free cloth, then wring it almost dry. Water should not pool. Wipe along the wood grain, especially inside the groove. Allow the area to dry for 20 to 30 minutes.

If the scratch exposes pale raw wood, avoid sanding aggressively. I once used heavy pressure on a similar table and widened the damaged area unnecessarily. A gentle approach is safer.

Prepare a fine sanding pad, a small putty knife, cotton swabs, clean cloths, compatible wood filler, and matching touch-up color. Choose filler according to the table’s material and finish. Water-based products may behave differently from oil-based finishes.

Test any cleaner or color on an hidden underside first. A hidden test matters. Gather disposable gloves and eye protection, even for a small repair.

Cheap tools can work, but sharp, clean edges improve control. Place a protective sheet beneath the table. Keep separate cloths for cleaning and coloring. Mixing them can spread residue across the finish.

If the scratch contains wax, grease, or polish, repeat the cleaning gently rather than forcing the residue deeper.

Fill and Level the Deep Scratch with Wood Filler

A deep scratch in a wooden table needs more than a quick coat of polish. I begin by cleaning the damaged area with a soft, slightly damp cloth. After it dries, I inspect the scratch for loose fibers, crushed edges, or hidden moisture. A sharp craft knife can trim splinters, but I use light pressure to avoid widening the damage.

Wood filler should sit slightly above the table surface. I press it into the scratch with a flexible putty knife, working across the grain. Deep damage may need two thin applications instead of one thick layer. Thick filler can shrink, crack, or remain soft underneath. I leave each layer to cure according to its instructions, even when the surface feels dry.

Then comes careful leveling. I wrap fine-grit sandpaper around a small, flat block and sand across the repaired area. Sanding with bare fingers can create a shallow dip. I once sanded too early and pulled soft filler from the center, so patience matters here. Remove dust before checking the surface under angled light. If the repair still catches a fingernail, add filler rather than forcing more sanding. Test any stain or finish on an unseen section first, because color can change dramatically after drying. The repair may not disappear completely, especially in heavily textured wood, but a level, stable surface is the essential result.

Blend the Repaired Spot with Stain or Matching Color

A deep scratch needs more than filler; its repaired color must follow the table’s surrounding grain. After cleaning the cut, press matching wood filler slightly below the surface. Let it cure fully, then level it with fine abrasive paper. Do not sand a wide area. You may create a pale halo around the repair.

Color matching works best in thin layers. The USDA Forest Products Laboratory’s Wood Handbook explains that species, grain direction, and light exposure can significantly change wood appearance. Test the stain on hidden wood or a spare sample first. Apply a small amount with a cotton swab, then wipe across the grain after several seconds. Build the tone gradually. Dark brown is rarely just dark brown.

Look closely at the edges. A successful repair should disappear from normal standing distance, not necessarily under a strong lamp. The USDA report also notes that indoor wood commonly reaches about 6–8% moisture content under typical heated conditions. That matters because unstable wood can shift slightly after repair. I sometimes add too much color while chasing a perfect match. That usually makes the spot worse. Let each coat dry before judging it. If the filler looks flat, draw tiny grain lines with a fine artist’s brush and diluted matching color. Finish with a compatible clear coat, feathered lightly beyond the repair. Avoid heavy buildup; gloss differences can reveal the patch faster than color.

How to Repair a Deep Scratch in a Wooden Table?

Use progressively finer sandpaper to level the damaged area before blending it with stain or a matching color.

Typical sanding sequence: Begin with coarse 80-grit paper for deep damage, then move through 120, 180, and 220 grit to smooth the repair before staining. Always sand with the wood grain and test the color on an inconspicuous area first.

Seal, Smooth, and Protect the Repaired Table Surface

A deep scratch exposes raw wood, so the repair must do more than fill the groove. It must seal the exposed fibers and match the table’s existing sheen.

Start by cleaning the area with a dry, soft cloth. Remove loose fibers with fine sandpaper, following the grain. Avoid widening the scratch. That mistake is easy to make.

Press a suitable wood filler into the deepest section with a small putty knife. Leave it slightly proud of the surface. Let it cure fully, even if it feels dry sooner. Sand it level with fine-grit paper, then remove every trace of dust.

I once rushed this step, and tiny particles stayed trapped under the finish. The repaired spot looked cloudy.

Apply a thin sealing coat with a clean brush or lint-free cloth. Test the finish on an hidden area first, because color and gloss can change after drying. Follow the product’s stated drying time.

Add another light coat only when the surface feels hard and smooth. Thin layers reduce drips and uneven shine.

Protect the table with coasters and felt pads afterward. Keep liquids away from the repair while it finishes curing. A final soft-cloth polish can improve the feel, but it cannot correct a rough seal. If the scratch reaches a veneer edge or has dark moisture damage, professional assessment may prevent a larger repair.

FAQS

How should I clean a deep scratch before repairing it?

Inspect it under a bright side light. Remove dust with a soft brush or vacuum attachment. Wipe along the grain with an almost-dry cloth. Let the area dry for 20 to 30 minutes.

Should I sand exposed raw wood aggressively?

No. Use fine sandpaper and follow the wood grain. Heavy pressure can widen the scratch. A gentle touch.

What materials are useful for this repair?

Prepare fine sandpaper, a small putty knife, cotton swabs, clean cloths, filler, and matching color. Wear gloves and eye protection. Place a protective sheet under the table.

How can I choose a suitable filler and finish?

Match the filler to the table’s material and existing finish. Water-based filler may react differently with an oil-based surface. Test the product underneath the table first. Test first.

How do I apply filler inside a deep groove?

Press filler into the deepest section with a small putty knife. Leave it slightly above the surface. Let it cure fully, even when it feels dry early.

Why can a repaired area look cloudy?

Fine dust may remain under the sealing coat. Sand the filler level, then remove every dust particle. I once rushed this step, and the result looked cloudy.

How should I seal and recolor the repaired surface?

Apply a thin sealing coat with a clean brush or lint-free cloth. Test the color and sheen on a concealed area. Add another light coat only after the first feels hard and smooth.

When might professional assessment be wise?

Consider help when the scratch reaches a veneer edge or shows dark moisture damage. A larger repair may otherwise become necessary. The risk is easy to underestimate.

Conclusion

Learning how to repair a deep scratch in a wooden table begins with carefully assessing how deep the damage is and identifying the table’s existing finish. Clean the scratched area to remove dust, wax, and grease, then lightly smooth any rough edges without removing more wood than necessary. Prepare suitable wood filler, a putty knife, fine sandpaper, a matching stain or color, and a protective finish.

Apply the filler slightly above the surface of the scratch, pressing it firmly into the damaged area. Once it has dried completely, sand it level with the surrounding wood and remove all sanding dust. Blend the repaired spot by applying stain or matching color in thin layers, allowing each layer to dry before adjusting the tone. Finally, seal the repair with a compatible protective coating, lightly smooth the surface if needed, and avoid placing heavy or damp objects on it until fully cured. This process can restore the table’s appearance while helping protect it from future damage.

Oliver

Oliver

Oliver is a seasoned marketing professional with a wealth of expertise in driving brand awareness and engagement. With a deep understanding of our company's product offerings, he consistently delivers high-quality content that enriches our professional blog. His insights not only shed light on......