Top Ways to Safely Disinfect Vintage Furniture

Time:2026-09-30 Author:Aria
0%

Vintage furniture can carry dust, skin oils, and microbes, yet its finish may be more fragile than the contamination. A damp-wiped oak table, a carved chair, and a velvet seat need different care. Knowing how to disinfect vintage furniture safely starts with identifying the material and checking for flaking lacquer, loose veneer, or weakened fabric. Small details matter.

The American Institute for Conservation’s guidance on caring for furniture emphasizes matching treatment to an object’s materials and condition. That principle helps prevent a well-meant cleaning from stripping wax or leaving pale rings. The U.S. Environmental Protection Agency also advises users to follow a disinfectant’s label, including its required wet contact time; a quick spray and wipe may not deliver the labeled result. Never assume one product suits every surface.

Safety deserves equal attention. A CDC report published in 2020 found that 39% of surveyed adults had used at least one non-recommended, potentially hazardous cleaning practice during the previous month. Labels are not decoration. For an heirloom, test a suitable cleaner on a hidden spot, use a soft cloth, and avoid soaking joints or upholstery. And pause when unsure. Sometimes, gentle cleaning—not aggressive disinfection—is the wiser choice, though deciding where that line falls can be difficult. The guidance ahead focuses on practical steps, material-specific cautions, and when to consult a furniture conservator.
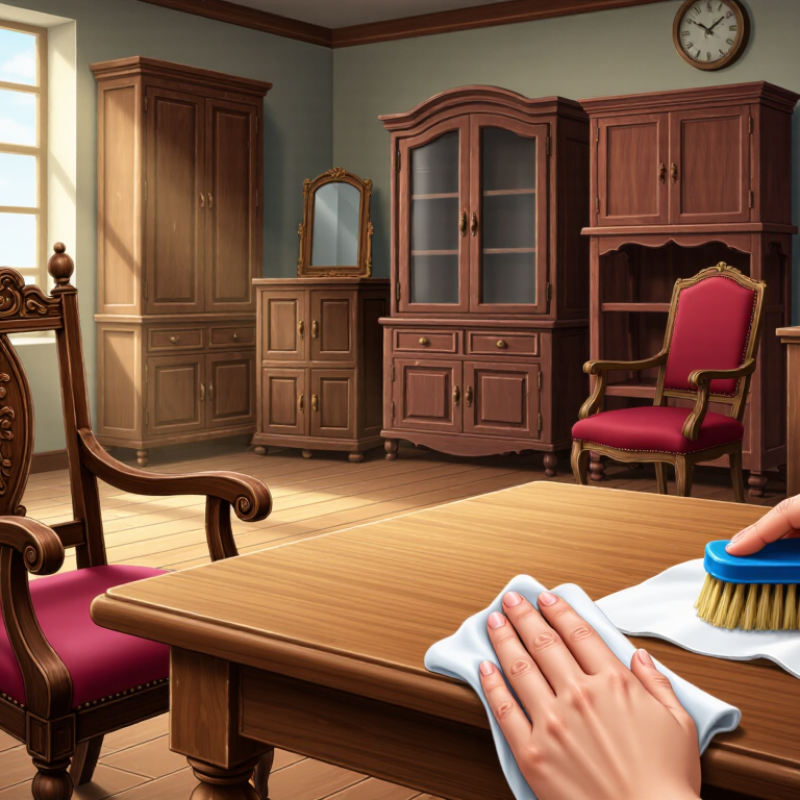
Top Ways to Safely Disinfect Vintage Furniture

Identify the Furniture’s Materials, Finish, and Condition

Before disinfecting vintage furniture, identify what you are touching. A carved oak leg, a veneered cabinet door, and a painted chair seat can react very differently to moisture. Check hidden areas for solid wood, veneer, metal, fabric, or older coatings. Look for lifting veneer, loose joints, cloudy finish, flaking paint, and water rings. Photograph defects and note them. The National Park Service’s Museum Handbook recommends documenting an object’s condition before treatment; this simple record can reveal damage that cleaning makes worse.

The finish matters as much as the material. Shellac may soften with alcohol, while wax can become streaky with strong cleaners. Test a barely damp cloth on an inconspicuous spot, then wait for changes in color, gloss, or tackiness. Stop if the finish transfers. Don’t guess. For upholstered pieces, inspect seams and labels, and avoid soaking the fabric or padding. The U.S. Environmental Protection Agency explains that disinfectants must stay visibly wet for the contact time on their label, which can vary by product and use. That prolonged moisture may harm delicate finishes. I have learned that “just a quick wipe” is not always harmless. If the surface is fragile, unknown, or already failing, consult a furniture conservator before applying a disinfectant.

Remove Dust and Surface Debris Without Abrasion

Vintage furniture often holds dust in carvings, joints, and worn finish. Begin with clean hands and bright, indirect light. Place a soft cotton cloth beneath loose hardware. Use a soft natural-hair brush to lift debris. Guide the dust toward a vacuum nozzle covered with fine mesh. Keep the nozzle above the surface. Never drag grit across the finish.

For flat panels, use a clean microfiber cloth with almost no pressure. Fold it often, so collected grit does not return. Avoid feather dusters; their fibers can catch splinters and fittings. Do not spray cleaner directly onto wood, veneer, leather, or painted decoration. Disinfect only after dust removal, using a method suitable for that material. A hidden-spot test can reveal cloudy finish or color transfer.

I once assumed a slightly damp cloth was harmless. It left a dull patch on an aged shellac surface. That mistake changed my method: dry cleaning comes first, and moisture stays minimal. If debris is sticky, pause rather than scrub. Ask a qualified furniture conservator to assess unknown finishes, flaking decoration, mold, or fragile veneer. Gentle handling is slower, but abrasion is often irreversible.

Top Ways to Safely Disinfect Vintage Furniture: Remove Dust and Surface Debris Without Abrasion

Start with the least aggressive method. Dry, soft tools reduce the risk of scratching fragile finishes, while moisture and pressure should be introduced only when necessary. The chart uses a practical abrasion-risk scale from 1, the lowest risk, to 5, the highest risk.

Choose a Disinfectant Compatible With the Materials

A disinfectant that works on sealed plastic may damage vintage wood. Identify the surface before choosing a product. A table may have shellac, wax, oil, lacquer, or a later coating, and these finishes react differently to moisture and chemicals. If the finish is unknown, test a small amount on a hidden spot. Wait until it dries, then check for cloudiness, tackiness, color transfer, or a softened surface. Test first.

Read the product label for both material compatibility and required wet contact time. A quick mist may not disinfect if the surface dries too soon, but soaking wood can cause swelling or lift a fragile finish. Less is safer. Apply liquid to a cloth rather than spraying directly near joints, veneer edges, or carved details. For upholstered furniture, check the care label and avoid products that could bleach fabric or leave residue; hidden padding may stay damp longer than the surface. Metal fittings also need care, since some chemicals can dull brass or encourage corrosion. There is no single safe disinfectant for every vintage piece. When an item is valuable, unstable, or sentimental, pause and ask a furniture conservator before treating it. That extra step can feel fussy, but a damaged finish is harder to undo than a cleaning delay.

Top Ways to Safely Disinfect Vintage Furniture - Choose a Disinfectant Compatible With the Materials

First remove dust and soil with a method suitable for the item. Disinfection is different from cleaning: use a disinfectant only when appropriate, follow its label, and test any treatment on an inconspicuous area. Vintage finishes and materials can be fragile.

Material or surface Safer approach Avoid or use caution with Important notes
Finished wood
Varnish, lacquer, shellac, or an uncertain finish
For routine cleaning, use a soft cloth that is barely damp with water and a small amount of mild detergent, then dry promptly. Disinfect only if the finish is known to tolerate a surface disinfectant and its label permits that use. Do not assume alcohol, bleach, hydrogen peroxide, or other disinfectants are finish-safe. Avoid soaking, abrasive pads, and prolonged wet contact. Solvents and moisture can soften, cloud, or lift some historic finishes. Test first in a hidden spot; stop if color or gloss transfers or changes.
Unfinished, raw, or visibly porous wood Remove loose dirt gently and keep the surface dry. If contamination presents a health concern, seek advice from a furniture conservator or qualified restoration professional. Avoid liquid disinfectants and scrubbing, which can drive moisture or soil into the wood and cause staining, swelling, or raised grain. Porous wood cannot be reliably disinfected by simply wiping its surface without risking damage. Cleaning does not necessarily eliminate microorganisms within the material.
Metal hardware
For example, brass, iron, or plated fittings
Wipe gently with a soft cloth and dry thoroughly. Use a disinfectant only if its label allows the specific metal and a discreet test shows no change. Avoid bleach and acidic cleaners; they can corrode or discolor metals. Do not use abrasive cleaning on plated or intentionally aged finishes. Keep liquids away from surrounding wood, joints, and crevices. Some patinas are intentional and may be permanently altered by cleaning.
Glass or glazed ceramic inserts Clean carefully with a soft cloth. If disinfection is needed, choose a product labeled for that surface and follow the required wet contact time without letting liquid run onto adjacent materials. Avoid abrasive powders and sudden temperature changes. Do not let cleaner pool at edges, where it may reach old adhesives or wood. Check for cracks, loose glazing, or unstable fittings before wiping. A surface treatment should not be used on a damaged insert without professional guidance.
Upholstery and vintage textiles Vacuum gently through a clean screen or use another low-impact method appropriate to the fabric. Consult a textile conservator or specialist cleaner before treating valuable, fragile, or unidentified fabric. Avoid spraying disinfectant directly, soaking, steam, and untested chemicals; these can cause dye bleeding, shrinkage, water rings, or damage to padding. Fabric, dyes, backing, and stuffing may react differently. A surface spray may not disinfect material beneath the upholstery.
Unknown, damaged, or highly significant finishes Use gentle dry dusting only until the materials and condition can be assessed. Ask a conservator for a treatment plan when the piece is valuable, historically significant, or visibly unstable. Do not apply a disinfectant merely because it is labeled for household surfaces; that does not establish compatibility with antique finishes. Follow the disinfectant label, including surface eligibility, ventilation, protective measures, and wet contact time. Never mix cleaning products.

Test and Apply the Disinfectant With Minimal Moisture

To disinfect vintage furniture, identify its surface before choosing a cleaner. Shellac, wax, and delicate paint can cloud or soften under alcohol or strong detergents. Even a sturdy-looking piece may have loose veneer, cracked lacquer, or dry joints. Read the disinfectant label and confirm it is suitable for the material. If you cannot tell what the finish is, ask a furniture conservator rather than guessing. Do not mix cleaning products.

Test the solution in a hidden spot, such as the back of a leg. Apply a small amount with a clean, white cloth, then wait for it to dry. Check for color transfer, tackiness, dullness, or swelling. A test spot can miss problems elsewhere, but it is still safer than treating the whole surface at once. For approved surfaces, apply disinfectant to the cloth, not directly to the furniture. Keep seams, joints, and exposed wood as dry as possible, and follow the label’s contact time without soaking the finish.

Tips: Use a barely damp cloth, not a dripping one. Work in small sections, and blot excess moisture promptly. Let the piece air-dry fully before replacing objects. Less moisture helps.

Dry the Furniture Thoroughly and Check for Damage

Drying is the quiet safeguard after disinfecting vintage furniture. The U.S. Environmental Protection Agency advises drying wet materials within 24 to 48 hours to limit mold growth. That window matters with drawers, joints, and fabric-lined compartments.

Remove drawers and open doors to expose trapped moisture. Place the piece in a shaded, well-ventilated room. Use fans for gentle airflow, but avoid directing heat at the surface. Hairdryers and heaters can shrink wood, split veneer, or loosen old glue. A moisture meter gives useful evidence. The USDA Forest Products Laboratory notes that wood decay fungi generally need moisture content above about 20 percent. Check several areas, not only the tabletop. Hidden wood can stay damp.

Inspect before returning hardware or applying polish. Look for raised grain, cloudy finish, lifting veneer, swollen edges, soft spots, and darkened joints. A musty smell is also information. EPA guidance recommends discarding porous materials that cannot be thoroughly dried and cleaned. That advice requires judgment with valuable upholstery or original linings. I once assumed a dry surface meant a dry cabinet. It did not. Wait until the interior feels dry, shows stable readings, and has no new odor. If damage appears, pause cleaning and consult a furniture conservator. Rushing may create damage that disinfection cannot repair.

FAQS

Why must I identify the furniture’s surface before choosing a disinfectant?

Wood finishes react differently to moisture and chemicals. Shellac, wax, oil, and lacquer may cloud, soften, or swell. Test first.

What should I do if I cannot identify the finish?

Test a hidden area, such as the back of a leg. If uncertainty remains, consult a furniture conservator. Guessing may cause permanent damage.

How can I perform a hidden-area test?

Apply a small amount with a clean, white cloth. Let it dry fully. Check for tackiness, dullness, color transfer, or swelling.

Can a hidden test guarantee the whole piece is safe?

No. A test spot can miss problems elsewhere. It is still safer than treating the entire surface immediately.

Should I spray disinfectant directly onto vintage furniture?

Usually, no. Apply it to a cloth instead. Direct spraying can wet joints, veneer edges, and carved details.

How much moisture should I use?

Use a barely damp cloth, not a dripping one. Work in small sections. Blot extra moisture promptly. Less moisture.

How long should the disinfectant remain wet?

Follow the product label’s required contact time. A quick mist may dry too soon. However, soaking wood can lift finishes or cause swelling.

How should upholstered or metal parts be handled?

Check the upholstery care label first. Avoid products that bleach fabric or leave residue. Metal fittings may dull or corrode.

What mistakes should I avoid when disinfecting vintage furniture?

Do not mix cleaning products. Do not replace objects before the piece dries completely. I might still hesitate with unstable or sentimental furniture.

Conclusion

Learning how to disinfect vintage furniture safely begins with understanding what you are cleaning. Identify the wood, veneer, metal, fabric, leather, or other materials, and examine the finish for cracks, flaking, discoloration, or previous repairs. Remove dust and loose debris gently with a soft cloth or brush, avoiding abrasive tools that could scratch delicate surfaces. Select a disinfectant that is compatible with the furniture’s materials and finish, avoiding harsh formulas that may strip, stain, or weaken the surface.

Before treating the entire piece, test the disinfectant on a hidden area and watch for color changes, swelling, or finish damage. Apply only a small amount with minimal moisture, working carefully rather than soaking the furniture. Keep liquid away from joints, seams, and unfinished areas whenever possible. Afterward, dry the piece thoroughly with clean, absorbent cloths and allow adequate airflow. Finally, inspect the furniture again for moisture marks, surface changes, or other damage, and stop treatment if any problem appears.

Aria

Aria

Aria is a dedicated marketing professional with a deep passion for innovative strategies and a keen understanding of our company's product offerings. With a wealth of experience in the industry, Aria excels at crafting engaging content that highlights the unique features and benefits of our......